

Financial markets do not always move in a single direction, and many traders look for strategies that can take advantage of repeated price fluctuations. Grid Trading is one such approach, using a series of pre-set buy and sell orders placed at different price levels to capitalize on market volatility. Rather than predicting the exact direction of the market, the strategy focuses on capturing opportunities created by price movements within a defined range. Understanding how this method works, along with its benefits and limitations, can help traders decide whether it fits their trading style and risk tolerance.
What Is Grid Trading?
Grid trading is a rule-based trading method that divides a selected price range into multiple levels. Buy and sell orders are then placed at, above, or below those levels according to a predefined plan. The objective is to respond to price movements within the range rather than rely on a single directional forecast.
For example, a buy order may open when the market reaches a lower grid level. If the price later returns to the next level above, that position may close at a target. The process can repeat as the market moves through the grid. However, the result depends on how the system handles trading costs, open positions, breakouts, and changes in volatility. A grid trading strategy is generally built around several connected decisions:
- The upper and lower price boundaries
- The distance between grid levels
- The number of active orders
- The size of each position
- The target assigned to each trade
- The maximum total exposure
- The conditions that stop or reset the system
- The trading costs that affect the final result
Grid trading should not be treated as an automatic profit system. The market may leave the selected range, continue trending in one direction, or move too little to cover execution costs. The effectiveness of the strategy therefore depends on market selection and risk management as much as it depends on order placement.
How Does a Grid Trading Strategy Work?
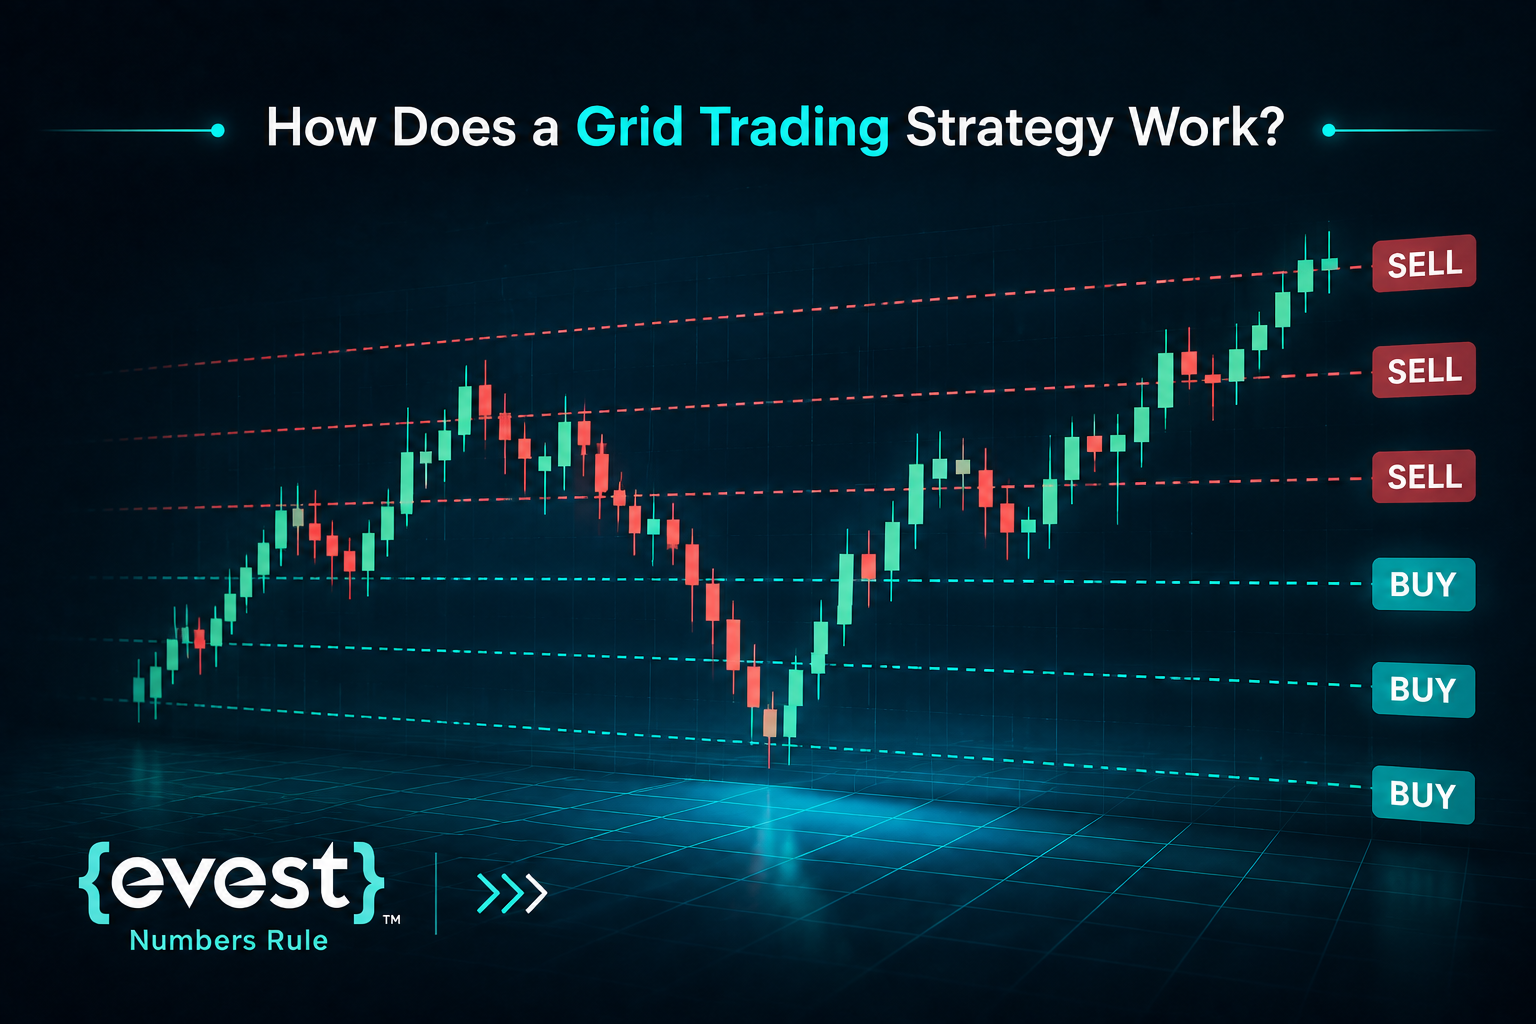
- Select a price range: Define the upper and lower boundaries where the strategy will operate.
- Divide the range into grid levels: Split the range into equal or variable intervals that become the grid levels for placing orders.
- Place buy and sell orders: In a neutral grid, buy orders are typically placed below the current market price, while sell orders are placed above it.
- Set profit targets: A long position opened at one grid level may have a take-profit order at the next level above, while a short position opened at an upper level may target the next level below.
- Choose the grid structure: The exact setup depends on the system. Some strategies use only pending orders, while others open an initial position and build the remaining grid around it.
- Manage open positions: Some systems close each trade independently, whereas others manage all open positions together as a single basket.
- Define trading rules before activation: Every order should have a clear purpose, with predefined entry rules, exit rules, stop conditions, and maximum exposure limits.
- Control risk: Without proper risk controls, the strategy may continue opening new positions as the market moves against the original trading assumption, increasing overall exposure.
Core Grid Trading Terms
- Grid levels: The price points where orders may be opened, managed, or closed.
- Grid spacing: The distance between two consecutive levels. It may be measured in pips, points, percentages, or another price unit.
- Price range: The upper and lower limits used to organize the grid.
- Number of grids: The number of intervals created within the selected range.
- Position size: The volume assigned to each order.
- Take-profit level: The price where an individual position may be closed for a gain before costs.
- Stop condition: A rule that pauses new orders, closes positions, or shuts down the system.
- Total exposure: The combined risk created by all open positions, not only the first trade.
- Basket management: A method that evaluates and closes several positions as one group.
- Reset rule: A condition that recenters or rebuilds the grid after market behavior changes.
A Simple EUR/USD Grid Example
Consider a simplified grid trading forex example using EUR/USD. Assume that the pair is trading near 1.0800 and that the selected price range is between 1.0750 and 1.0850. The spacing between each level is 10 pips. A basic grid trading setup could work as follows:
- Buy orders are placed below the current market price at levels such as 1.0790, 1.0780, and 1.0770.
- Each buy order may have a corresponding closing target 10 pips above its entry.
- If a buy order opens at 1.0790 and the price later returns to 1.0800, that position may close at its target.
- If the market continues falling, additional buy orders may open at lower levels.
- If the price recovers, some positions may close as the market crosses their individual targets.
- If EUR/USD breaks below 1.0750 and continues falling, the system needs a predefined rule for existing positions and future orders.
The final result is not simply the number of completed 10-pip movements. Spreads, commissions, slippage, overnight financing, and unresolved positions all affect performance. A grid may close several profitable trades while the overall account remains under pressure because of larger open losses. This example is provided for educational purposes. Real prices, order execution, available products, margin requirements, and costs may vary according to market conditions.
Key Parameters in a Grid Trading Setup
A grid trading setup should reflect the behavior of the selected market and the level of risk the trader can accept. Copying the same settings across different instruments, market conditions, or account sizes can produce very different outcomes.
Upper and Lower Price Boundaries
The boundaries define the area in which the strategy expects to operate. They may be based on support and resistance, recent consolidation, volatility, or another analytical method. These boundaries do not automatically protect the account. They may stop new orders if the system is programmed that way, but existing positions can remain open after the market leaves the range. The strategy therefore needs a separate breakout and exit plan.
Grid Spacing
Narrow spacing creates more levels inside the same range. This may increase the number of triggered orders, but it can also increase transaction costs, order density, and total exposure. Wider spacing usually creates fewer trades. It may reduce the effect of small price fluctuations, but it does not guarantee lower losses or prevent a stop-out. Leverage, margin, position size, market direction, and accumulated exposure remain important. Spacing may be fixed or adjusted according to volatility. A percentage-based method may suit assets that trade across broad price ranges, while pip-based spacing may be easier to understand in some forex examples.
Number of Grid Levels
More levels can cover a wider area or divide the same range into smaller intervals. Both choices may increase the number of potential positions. The complete risk should be calculated as if every planned order were triggered. Evaluating only the first position understates the potential exposure. The calculation should include total volume, margin use, possible drawdown, and the distance to any forced closing or liquidation level.
Position Size per Grid
Position size should be based on the account balance, instrument value, leverage, margin requirements, and maximum total exposure. A fixed lot size cannot be described as suitable for every trader because the same size may represent very different levels of risk across accounts and products. Some systems use equal position sizes at every level. Others increase or reduce the size as the price moves. Increasing position size after losses can accelerate drawdown and margin pressure. Any variable-sizing method should be tested as part of the entire system rather than judged by isolated winning trades.
Target per Grid
The target for each completed trade should be compared with the expected cost of execution. These costs may include:
- Bid-ask spread
- Commission
- Slippage
- Overnight financing
- Funding fees
- Currency conversion costs
- Other product-related charges
A narrow grid may generate frequent trading activity while producing a weak net result if costs consume most of each price movement.
Maximum Exposure
A grid needs a limit on the total number of open positions, total volume, used margin, or account drawdown. Without such a limit, the system may continue adding positions as the market moves in one direction. Maximum exposure is not the same as placing a stop-loss on one individual trade. It is a portfolio-level control that applies to the entire grid.
Breakout and Shutdown Conditions
A complete grid trading setup defines what happens when the original market assumption fails. Possible rules may include:
- Stopping new orders beyond a price boundary
- Closing some or all open positions
- Reducing the size of new positions
- Pausing the system during abnormal volatility
- Rebuilding the grid after a new range is confirmed
- Shutting down when margin use or drawdown exceeds a limit
These are planning examples rather than universal recommendations. The appropriate rule depends on the market, product, and strategy design.
Types of Grid Trading Strategies
There is no single grid structure suitable for every market. The main types differ according to their directional bias, adaptability, and the market conditions they are designed to address.
Neutral Grid
A neutral grid places orders around the current market price without making a strong directional assumption. It is designed for a market that continues moving between relatively stable support and resistance levels. The strategy may repeatedly open and close positions while the range remains intact. Its primary weakness appears when the market breaks out and continues moving in one direction. Positions on the wrong side of the move may accumulate, while previous boundaries stop behaving as expected. A neutral grid therefore requires a clear process for determining whether the original range remains valid.
Trend-Following Grid
A trend-following grid aligns most new positions with the current market direction. In an uptrend, the strategy may focus on buy orders and use temporary pullbacks to enter or add positions. In a downtrend, it may focus mainly on sell orders. This structure may reduce the conflict created by trading against a clear trend, but it introduces different risks. Trends can reverse, weaken, or produce sharp corrections. The system should define how the trend is identified, when it becomes invalid, and how exposure is reduced after a reversal.
Counter-Trend Grid
A counter-trend grid places orders against the prevailing direction in anticipation of a correction or reversal. For example, it may place sell orders at higher levels during an uptrend if the strategy expects a temporary pullback. The main risk is that the trend may continue for longer than expected. Several positions may then accumulate against the direction of the market. Technical indicators may be used as one input, but an overbought or oversold reading does not guarantee that a reversal will occur.
Static Grid
A static grid keeps its price range, spacing, and number of levels fixed after activation. It may be easier to understand and test because its rules remain stable. However, fixed settings do not mean that the market will remain stable. Volatility, liquidity, spreads, and market direction can change after the grid starts. A static system still requires monitoring and a shutdown process.
Dynamic Grid
A dynamic grid changes one or more parameters when market conditions change. It may widen spacing during higher volatility, shift the center of the range, reduce the number of active levels, or change its directional bias. Greater flexibility can improve adaptability, but it also increases complexity. Every adjustment rule creates another variable that needs to be tested. A dynamic grid may become difficult to evaluate if its settings change too frequently or react to short-term market noise.
Grid Trading Forex
Grid trading forex strategies are commonly discussed because currency pairs may spend extended periods moving within identifiable ranges. However, a forex grid needs to account for several market-specific factors.
Pair-Specific Volatility
The same pip spacing does not behave identically across all currency pairs. A 10-pip movement may represent normal market noise in one pair and a more meaningful move in another. Volatility can also change according to the trading session, economic events, liquidity, and the wider market environment. Spacing should therefore be tested against the behavior of the selected pair rather than copied from a generic example.
Spread and Execution
Every forex order interacts with the bid-ask spread. When the distance between grid levels is narrow, the spread may consume a meaningful part of the intended target. Slippage may also change entry and exit prices during fast-moving or less liquid markets. The system should therefore be evaluated using realistic execution costs rather than ideal chart prices.
Overnight Financing
A forex grid may hold positions overnight. Depending on the instrument and the direction of the position, overnight financing charges may apply. A position that remains open for several days can produce a very different net result from the same position closed during the same trading session.
Leverage and Margin
Leverage allows traders to control a larger market position using a smaller amount of margin. It also magnifies the effect of market movements on the account. A grid may open several positions, causing margin use to rise quickly. Risk should be calculated using the maximum planned number of orders, not only the first entry.
Market Schedule
Forex does not trade continuously throughout the entire week. Trading sessions, rollover periods, public holidays, and weekend closures may affect liquidity, spreads, and available pricing. Open positions may also be exposed to price gaps when the market reopens. For this reason, grid trading forex should not be treated as a completely passive process that can run without supervision.
Grid Trading Crypto
Grid trading crypto systems are often associated with markets that operate continuously and experience frequent price movements. Continuous trading may create more opportunities for price movement, but it also increases the period during which the strategy remains exposed.
Spot and Leveraged Crypto Grids
A spot grid generally buys and sells the underlying crypto asset within a selected range. A leveraged grid may use margin or derivatives. Leveraged products can introduce liquidation, funding, and amplified-loss risks that do not apply in the same way to an unleveraged spot position. The product type should always be identified before assessing the strategy.
Volatility and Range Failure
Crypto assets can move sharply and remain outside a previous trading range. A neutral grid may continue buying during a decline or selling during a rise, depending on its programmed rules. Historical support and resistance levels can fail quickly. The setup should therefore include a response for sudden breakouts, reduced liquidity, and periods of extreme volatility.
Fees and Funding
Frequent transactions may create high costs. Leveraged crypto positions may also incur funding charges. A backtest that ignores these costs can overstate the apparent performance of the grid.
Operational Risk
Automated crypto systems may depend on software, data feeds, servers, or external connections. Downtime, rejected orders, incorrect data, or connection loss may interrupt the intended order logic. Grid trading crypto therefore combines market risk with technical and product-specific risks.
How Does a Grid Trading Bot Work?
A grid trading bot is software that places and manages orders according to predefined rules. It can monitor price levels, submit pending orders, assign targets, cancel outdated instructions, and apply shutdown conditions. The bot does not automatically know whether the strategy is suitable unless that decision is included in its programming. It simply executes the rules it receives. Poor settings may therefore be automated just as consistently as well-tested settings. A typical grid trading bot may require the user to define:
- The selected instrument
- The upper and lower price range
- The number of grid levels
- The spacing method
- The direction of the orders
- The position size
- The target for each trade
- The maximum number of open positions
- The basket exit or stop condition
- The operating schedule
- The reset condition
A bot may improve execution consistency and reduce manual order-entry errors. It may also monitor several price levels simultaneously. However, a bot cannot guarantee profits, prevent market breakouts, remove slippage, or ensure that every order will be filled at the requested price. It may also fail because of connectivity problems, incorrect settings, software errors, or unexpected market conditions. Automated grid trading should therefore be understood as rule-based execution, not as the removal of trading risk.
Automated Grid Trading Setup
The following process provides an educational framework for evaluating a grid system before considering the use of real capital.
Step 1: Define the Market and Product
Identify whether the strategy will be applied to forex, spot crypto, a leveraged product, or another financial instrument. Review the trading hours, product specifications, costs, leverage, and margin rules.
Step 2: Identify the Market Condition
Determine whether the market is ranging, trending, or moving between different conditions. A grid designed for consolidation can behave very differently during a breakout or sustained trend.
Step 3: Select the Range
Choose the upper and lower boundaries using the analytical method behind the strategy. The range should also include a condition that declares it invalid.
Step 4: Choose the Grid Spacing
Compare fixed, percentage-based, and volatility-based spacing. Estimate how many orders may open during normal market movement and during a more extreme scenario.
Step 5: Calculate Total Exposure
Model the outcome if every planned order is triggered. Include total position volume, margin use, possible drawdown, and the distance to any forced closing or liquidation level.
Step 6: Include Trading Costs
Estimate spreads, commissions, slippage, overnight financing, and funding costs. Evaluate the expected net result rather than focusing only on gross targets.
Step 7: Define Exit and Shutdown Rules
Decide what happens after a breakout, drawdown limit, volatility increase, technical problem, or change in the original market condition.
Step 8: Backtest the Strategy
Test the full rule set across different historical periods. The test should include ranges, trends, high volatility, low volatility, and realistic transaction costs. Historical results do not guarantee future performance, and a strategy may be overfitted to past data.
Step 9: Use Forward Testing
Observe how the system behaves with live market prices in a simulated environment. Forward testing may reveal execution or monitoring problems that are not visible in historical testing.
Step 10: Monitor and Review
Check active orders, total exposure, margin use, spreads, connectivity, and whether the market still matches the original setup. Automated does not mean unattended.
Advantages of Grid Trading
A properly defined grid may offer several practical characteristics.
1- Rule-Based Execution: Orders are planned in advance, reducing the need to make a completely new decision after every price movement.
2- Potential Use in Ranging Markets: A grid is designed to respond to repeated movements between price levels. This may make it relevant when the market remains within a relatively stable range long enough for trades to be completed.
3- Multiple Entry Levels: The strategy does not depend on one entry price. Instead, it distributes orders across several predefined levels.
4- Reduced Manual Execution: Automation may reduce some manual order-entry errors and apply the same rules consistently.
5- Clear Testing Framework: Because the rules can be defined numerically, the system may be easier to back test than a strategy based entirely on subjective judgment.
Disadvantages of Grid Trading
The same structure that creates repeated entries can also create concentrated risk.
1- Exposure Can Accumulate: If the market moves strongly in one direction, the grid may open several positions without completing their exits. Total exposure may become much larger than the first position suggests.
2- Breakouts Can Invalidate the Setup: A neutral grid depends on repeated movement within a range. Once the market leaves that range and continues moving in one direction, the original setup may no longer be valid.
3- Costs Can Reduce the Result: Frequent trading creates repeated costs. A system with several small gains may still lose money after spreads, commissions, slippage, financing, and funding are included.
4- Margin Requirements Can Increase: More grid levels and larger positions require more capital or margin. Leveraged grids may approach margin limits quickly during adverse market movement.
5- Automation Creates Technical Risk: Connection failures, incorrect settings, rejected orders, delayed execution, and software errors may change the expected behavior of the strategy.
6- A High Win Rate Can Be Misleading: A grid may close many small winning trades while carrying a few large open losses. The percentage of winning trades should not be evaluated without considering drawdown, open exposure, and the size of the largest losses.
Grid Trading with Evest: What Traders Should Consider?
Before applying a grid trading strategy through Evest, traders should first review the instruments available on their account, along with the relevant spreads, commissions, leverage, margin requirements, and trading hours. These conditions can directly affect the performance and risk of any grid trading setup, particularly when multiple positions are active at the same time.
Traders should also confirm whether their selected Evest platform and account type support the order functions or automated tools required by their strategy. The availability of automated grid trading, Expert Advisors, or other bot-based features may depend on the platform, product, jurisdiction, and account conditions.
Evest provides access to financial markets, but the responsibility for selecting the grid range, position size, exposure limits, and exit rules remains with the trader. Before using real capital, traders should understand how the strategy behaves during strong trends, widening spreads, increased volatility, and periods of reduced liquidity.
Any grid trading strategy used through Evest should be supported by a clear risk plan. This may include a maximum number of open positions, a total exposure limit, a drawdown threshold, and predefined rules for stopping the strategy when the original market range is no longer valid.
FAQs
Is grid trading profitable?
Grid trading can produce profitable periods when market conditions, settings, and costs match the system’s assumptions. However, breakouts, sustained trends, excessive leverage, and accumulated exposure can create significant losses. Profitability should include open positions, drawdown, fees, financing, and execution costs.
Is grid trading suitable for beginners?
The order structure may appear simple, but managing several open positions can make total risk difficult to understand. Beginners should first understand position sizing, leverage, margin, drawdown, trading costs, exposure limits, and exit rules before considering a grid trading strategy.
Does grid trading require a stop-loss?
A grid requires a method for limiting losses, although it may not always use one traditional stop-loss. Controls can include individual stops, basket exits, exposure caps, range invalidation rules, margin thresholds, or drawdown limits established before the system starts operating.
Can a grid trading bot run without monitoring?
A grid trading bot can automate placement and management, but it should not operate without supervision. Market conditions, spreads, margin use, connectivity, rejected orders, and software behavior can change unexpectedly, requiring traders to monitor performance and intervene when limits fail.
What is the difference between a static and dynamic grid?
A static grid keeps its range, spacing, and levels fixed after activation. A dynamic grid changes one or more settings according to predefined market conditions. Dynamic systems may adapt better, but their complexity makes testing, evaluation, and supervision more demanding.
Is grid trading better for forex or crypto?
Neither market is automatically better for grid trading. Forex requires attention to sessions, spreads, leverage, overnight financing, and weekend gaps. Crypto requires attention to continuous trading, volatility, transaction fees, funding costs, liquidity, and whether the product is spot or leveraged.
How many grid levels should be used?
There is no universal number of grid levels. The decision should reflect the selected range, spacing, trading costs, position size, available capital, margin requirements, and maximum exposure. Traders should calculate the outcome if every planned order is triggered before activation.
What happens when the price leaves the grid?
The outcome depends on the system’s predefined rules. It may stop opening orders, close existing positions, remain exposed, reduce position sizes, or rebuild the grid around another range. This response should be defined before activation, not decided during market stress.
Is backtesting enough to validate a grid strategy?
No. Backtesting helps evaluate historical behavior, but results depend on data quality, execution assumptions, transaction costs, and possible overfitting. Forward testing, realistic cost estimates, live monitoring, and periodic review are also necessary because historical performance cannot guarantee similar future results.